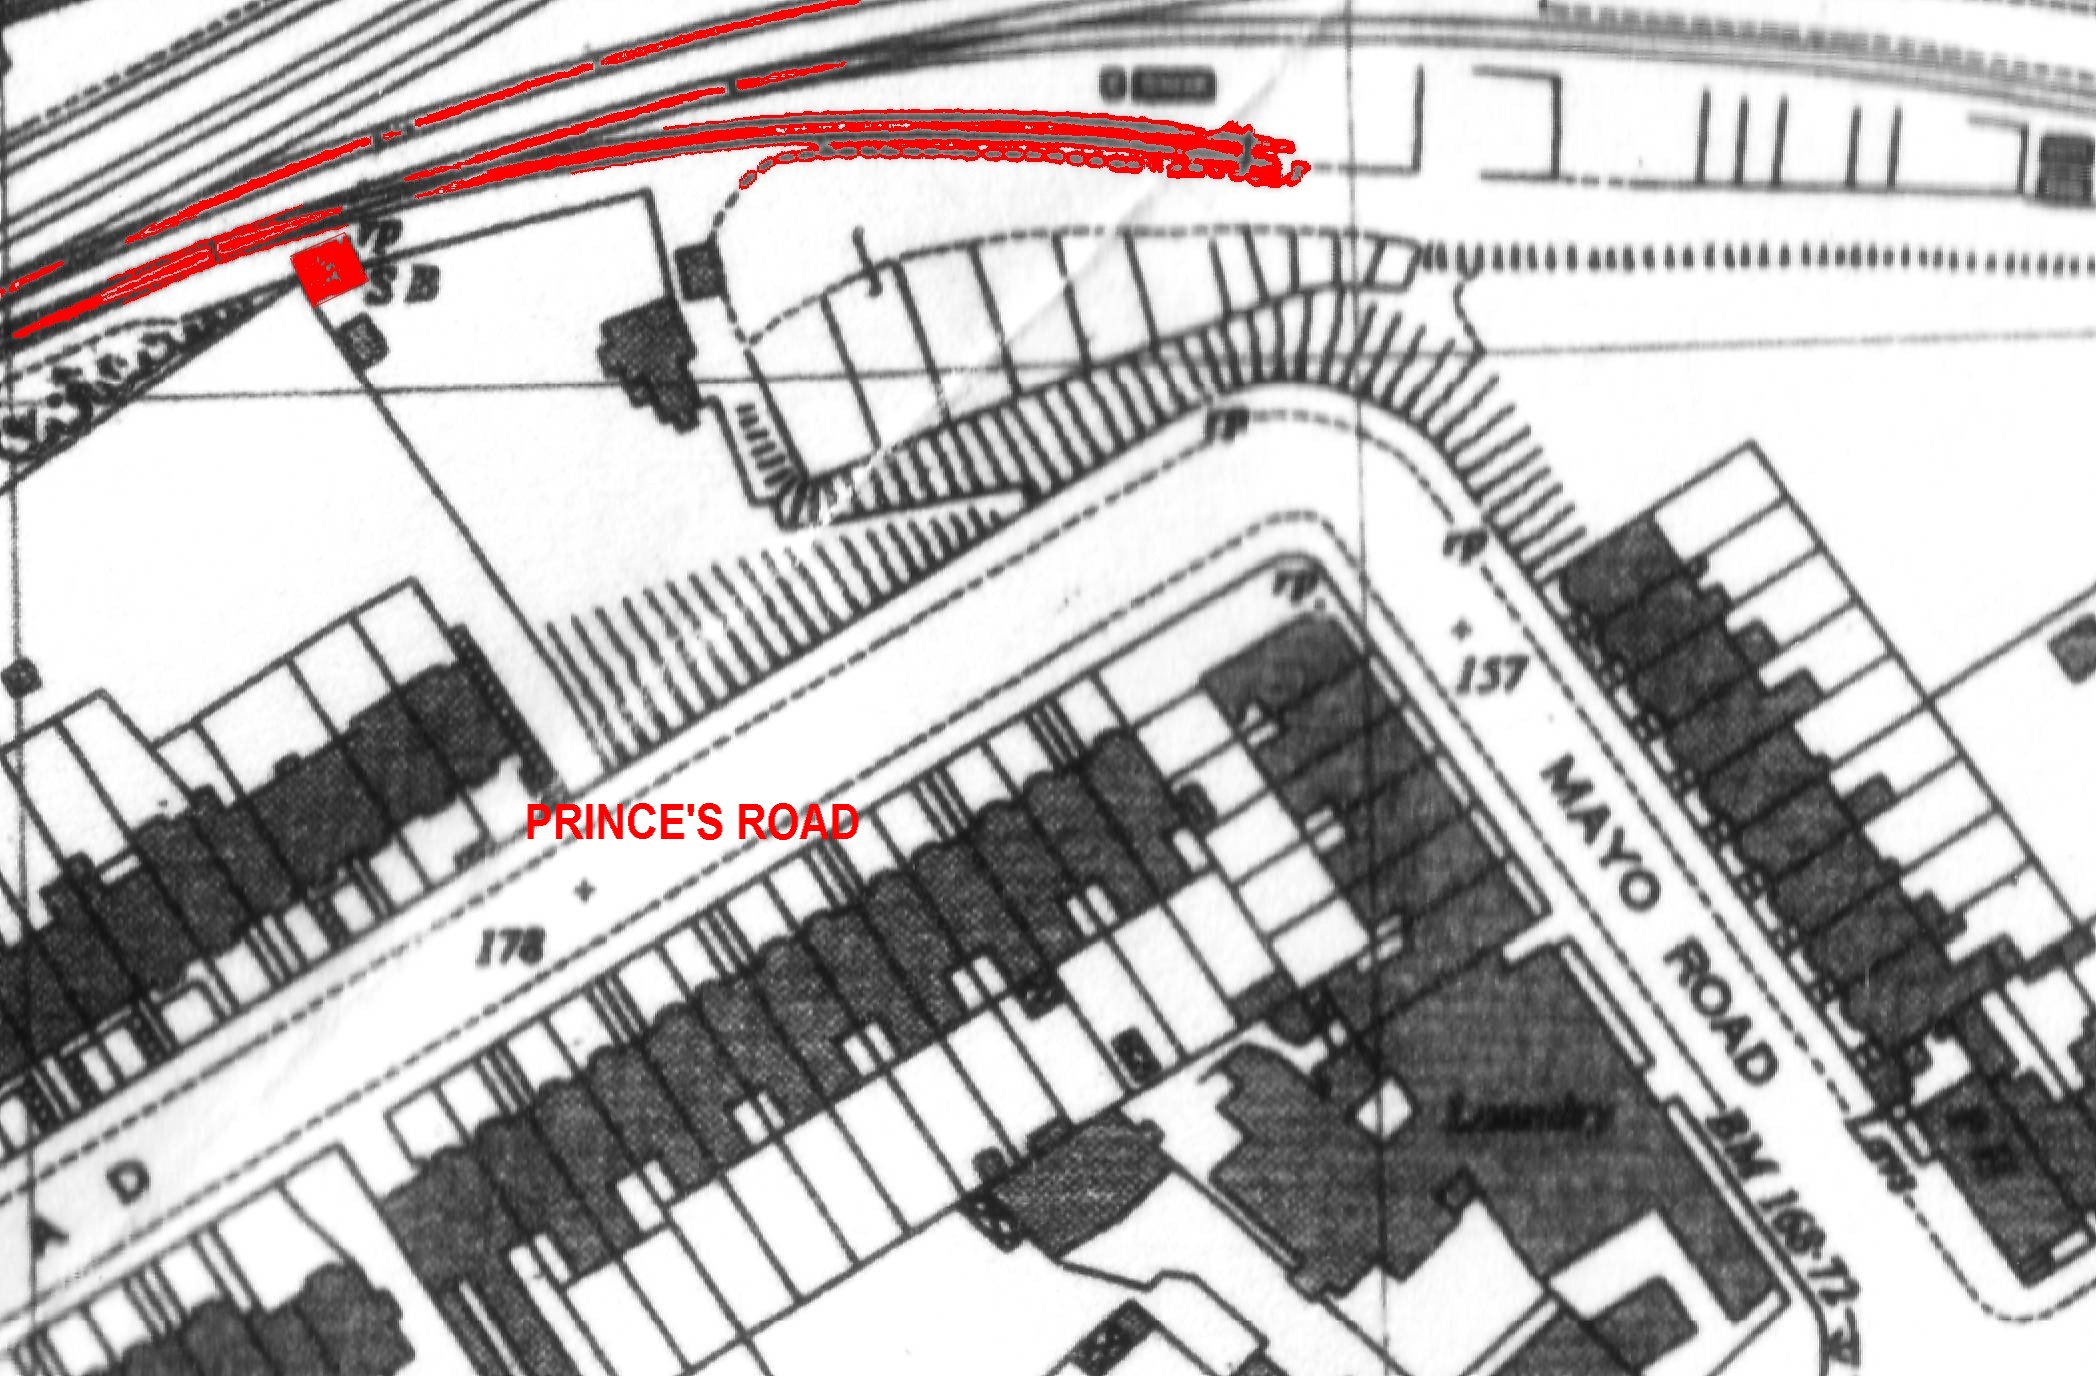
Above:
This map shows positions of items in
the photos shown below, relative to Mayo Road & Prince’s Road in order to
make it easier to compare to the modern map at the bottom of the page.
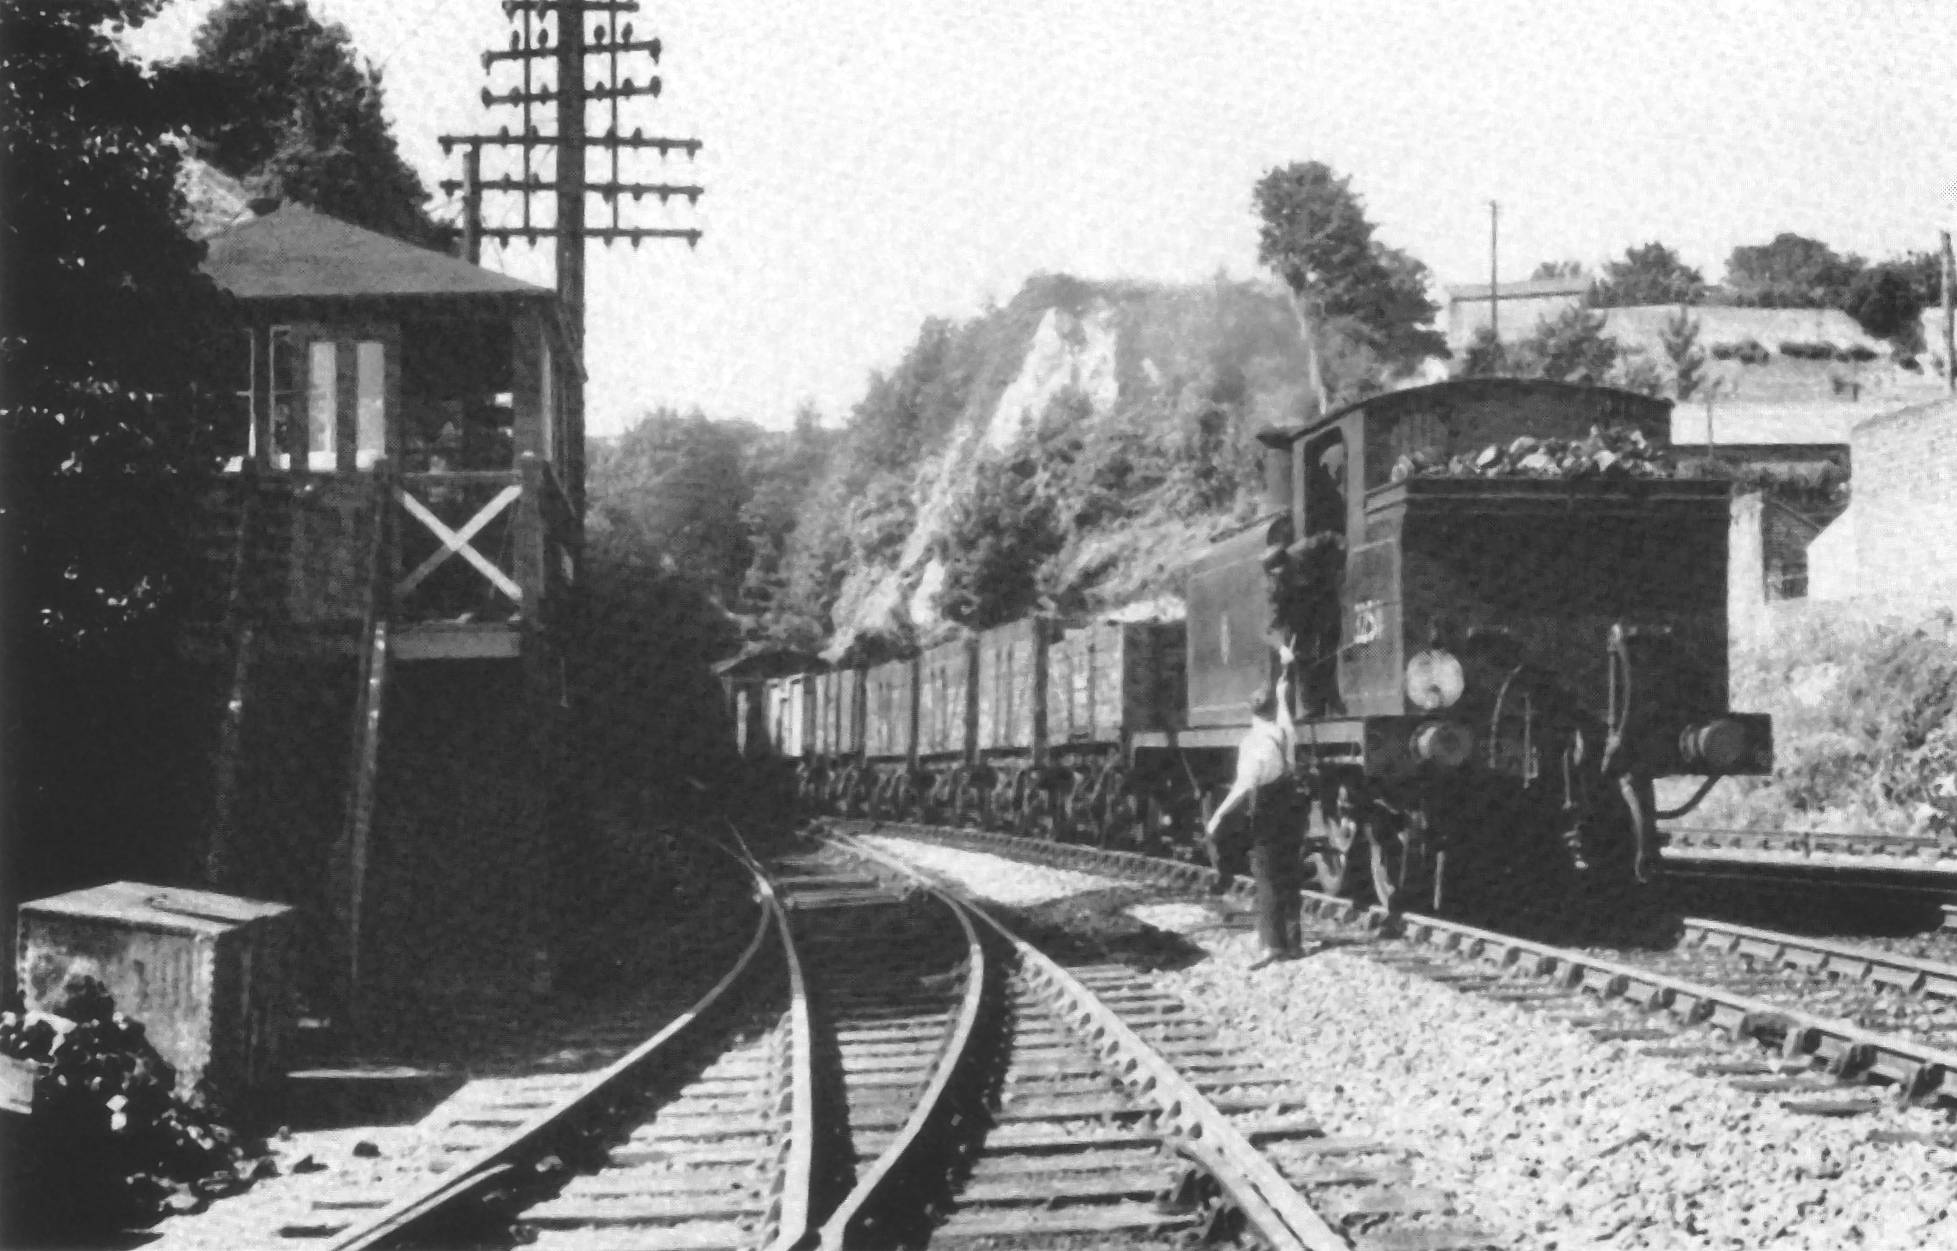
Above: The Lewes Road Signal box is seen here
looking back along the cutting towards the tunnel under Ditchling Road, in 1954. The Box housed a
19 lever frame and dates from the time the Kemptown Branch was originally
opened. The “stilts” variety of signal box was quite popular in the Brighton
area, as similar structures could be seen at Lover’s Walk and the entrance to
Brighton Station’s Goods Yards, mentioned elsewhere. The locomotive is an E4
class (No. 32511) at the head of a daily goods train to Kemptown Station.
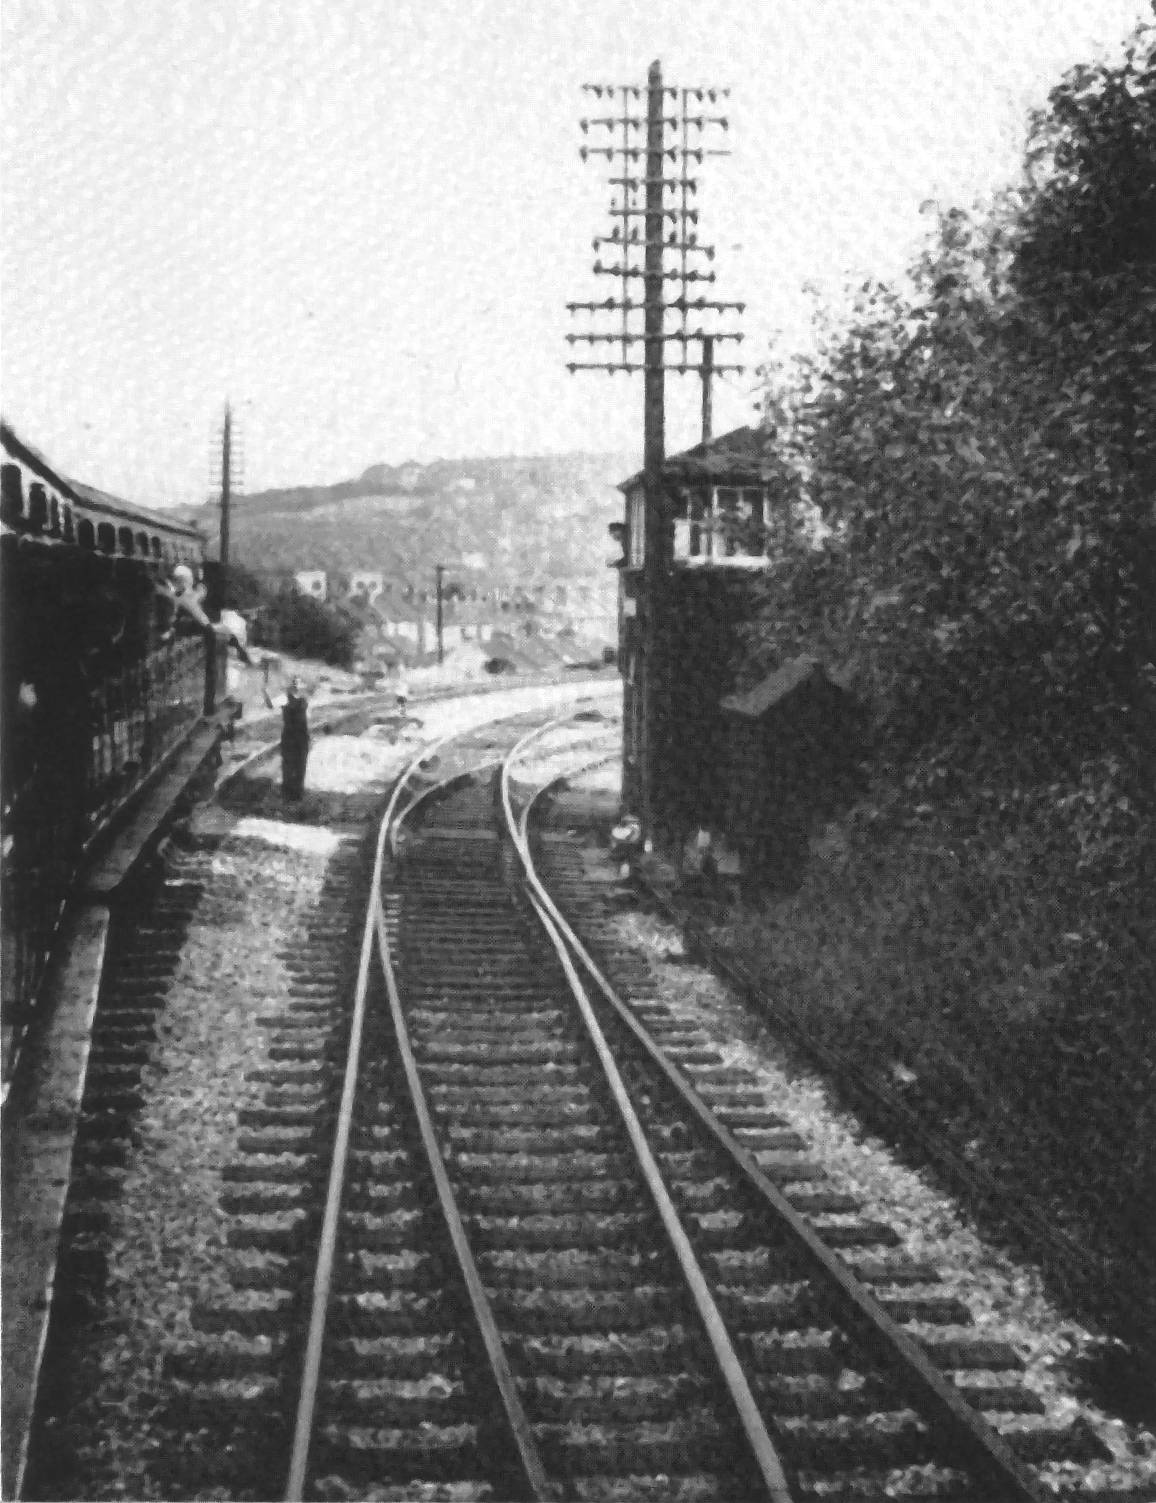
Above Right: Another view of the Lewes Road signal box, this time looking
towards the station and Lewes Road
Viaduct. This picture is quite deceptive in that it gives the impression of
quite complex double trackwork. However, the Kemptown Branch was single track
for the whole of its length, save for the tracks leading to the coal and goods
sidings, of which the pointwork shown here is part.
Note the huge of telegraph poles: at
this time, the majority of Railway telephone systems were used jointly with the
omnibus company. The calls were clearly audible to anyone who tapped into them
and I can’t help wondering if this fact alone sped up the demise of the Kemptown
Branch to bus routes. Maybe the bus drivers tapped the phones and got there
first!!
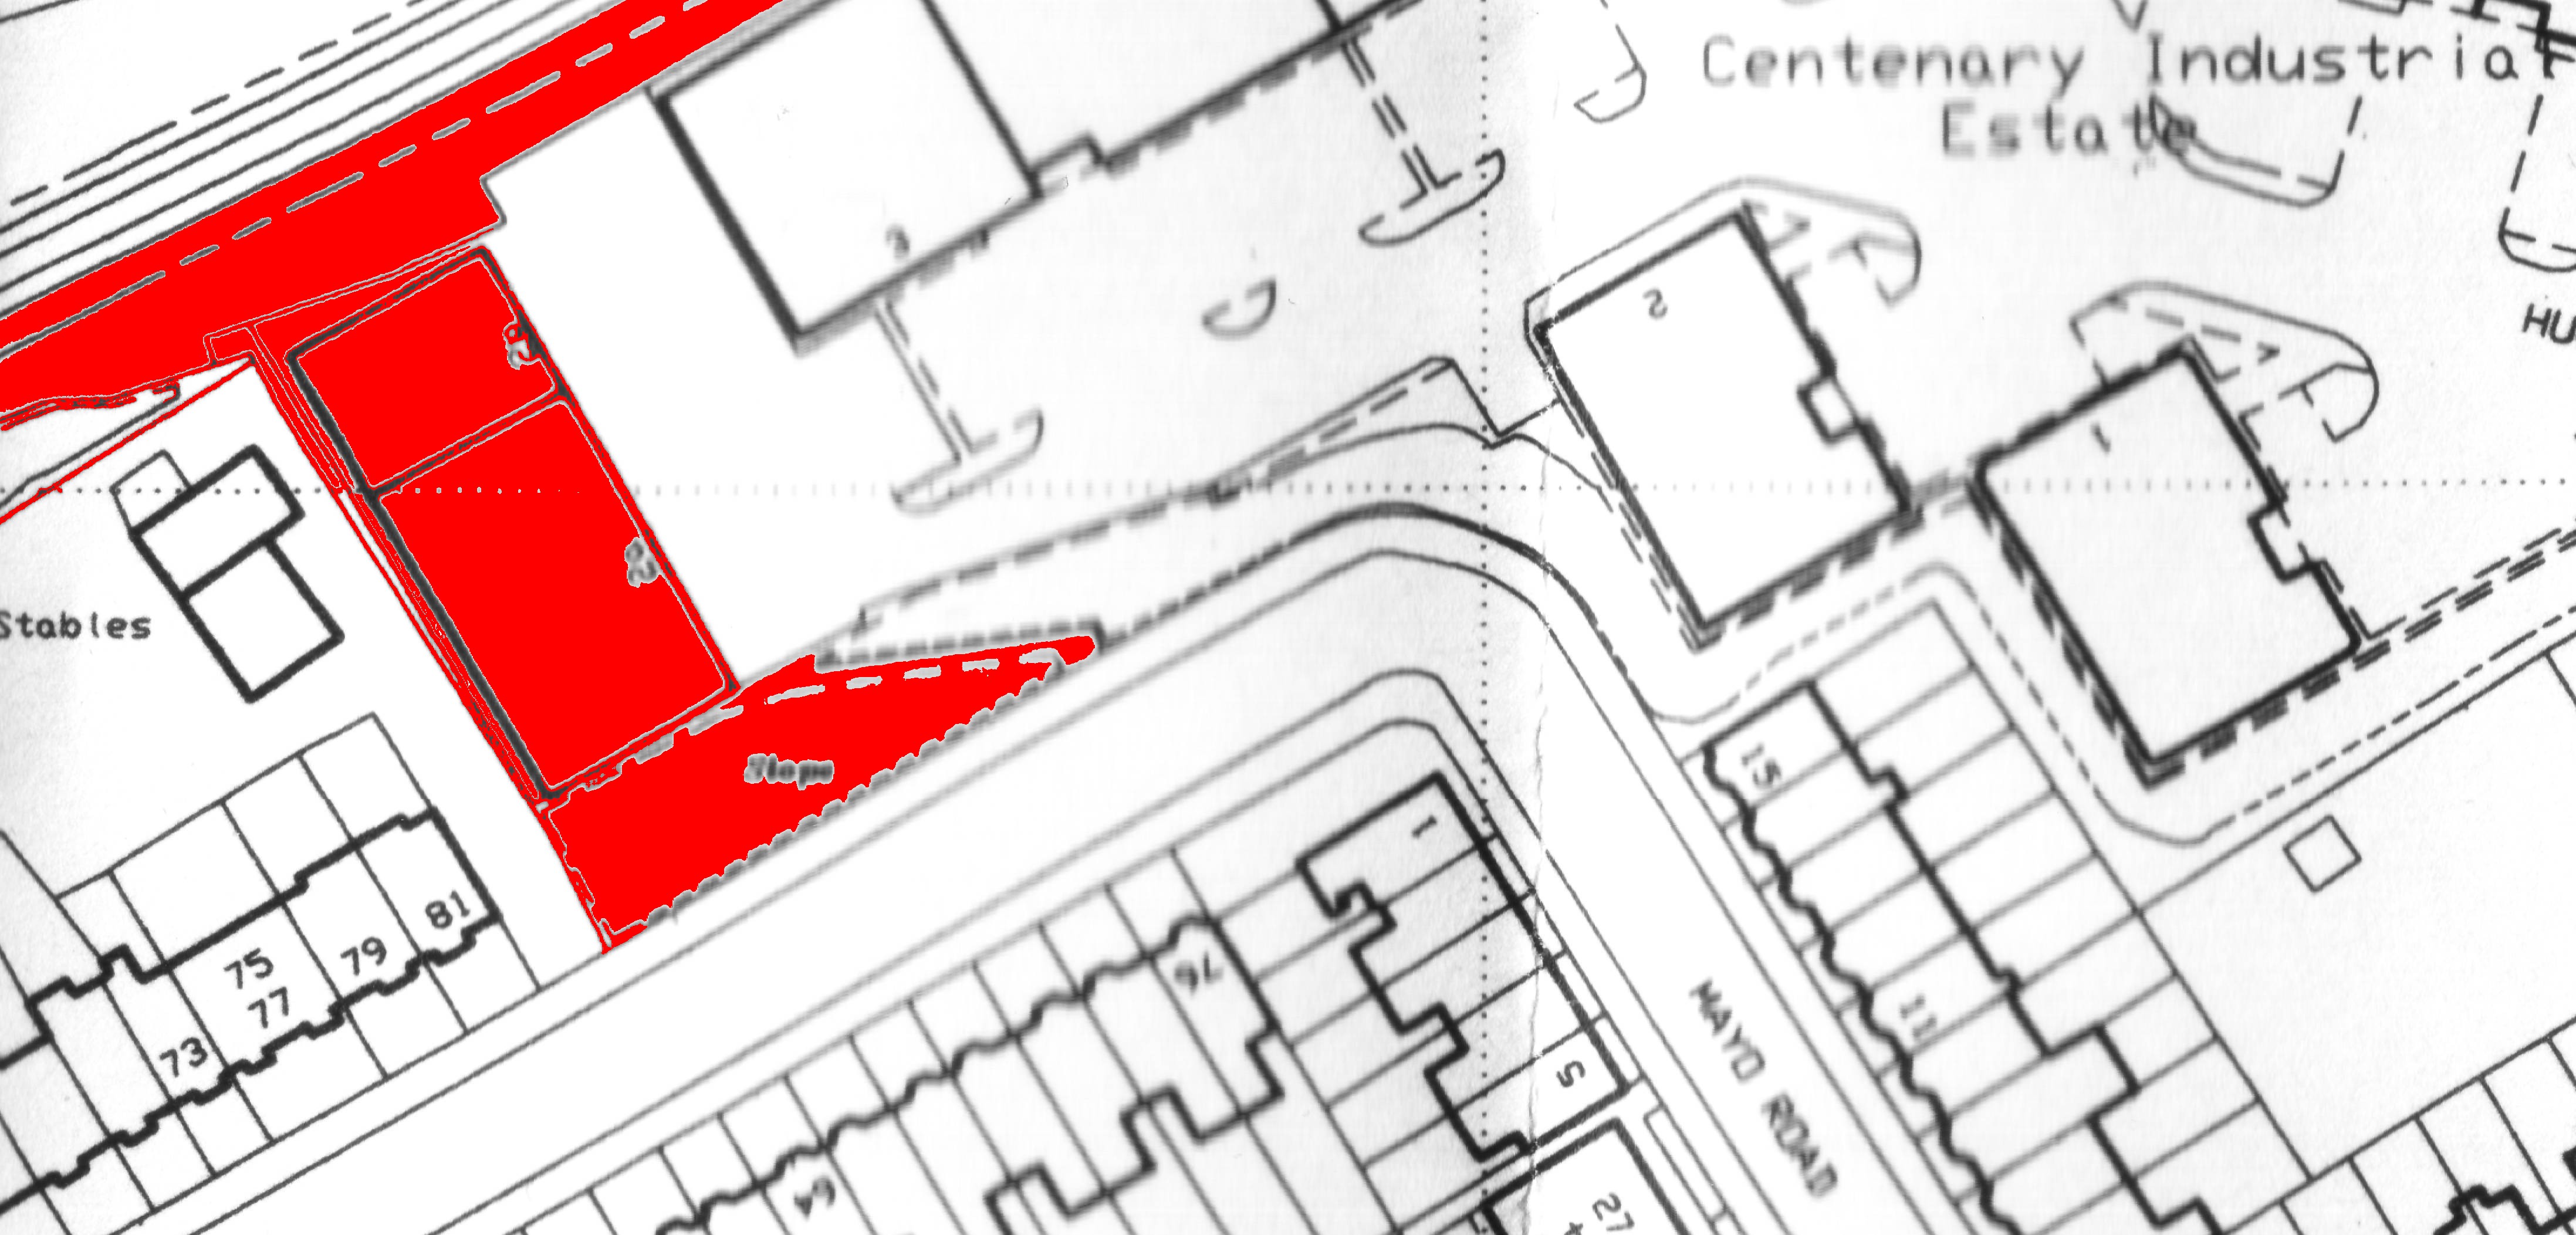
Above: Units 2A and
2B on the Centenary Industrial Estate, Hughes Road are seen here shown in red. It is hard
to believe, looking at the Industrial Estate in the present day, that any of
the old railway workings ever existed. The signal box for the Branch, Goods and
Coal Yard stood at what is now the left hand end of this block.
This map shows the
position of units 2A & 2Brelative to Prince’s Road & Mayo Road junction
in order to make it easier to compare to the older map location shown at the top of the page.